Leave Your Message

How to Choose the Right LCD Module for Your Product?

How to Choose the Right LCD Module for Your Product?

Choosing an LCD Module is not simply a matter of selecting the largest, brightest screen. It is an engineering decision involving visibility, power, reliability, integration, and long-term supply. Omdia’s Display long-term demand forecasts continue to track LCD as a major display technology across automotive, industrial, medical, and consumer applications. That sustained demand matters. It supports broader manufacturing capacity, but it does not guarantee that every panel suits your product.

Start with the user’s real environment. A handheld medical device may need a 3.5-inch sunlight-readable display, glove-friendly touch control, and stable operation near disinfectants. A factory controller may require a wider viewing angle, an extended temperature range, and a robust connector. A dashboard display needs optical bonding, vibration resistance, and controlled brightness at night. Small details become expensive later.

DSCC’s Display Capex and Equipment Market Share research provides useful context about panel manufacturing investment and supply trends. However, market data cannot replace product-level testing. Confirm resolution, interface, luminance, contrast, viewing angle, touch compatibility, and mechanical dimensions with measured samples. The datasheet is only the beginning.

Check lifecycle risk, too. IDC’s Worldwide Quarterly Mobile Phone Tracker illustrates how quickly electronics markets and product cycles can change. Industrial products often remain active much longer than consumer devices. A cheaper module may create redesign costs when its controller or backlight becomes unavailable. This is where procurement, engineering, and quality teams should review the same evidence.

There is no perfect choice.

A practical evaluation includes prototype testing, temperature trials, sunlight checks, and supplier audits. I would also challenge my first decision. The brightest LCD Module may consume too much power, while the lowest-cost option may fail after installation. Reliable selection balances present performance with future serviceability.

How to Choose the Right LCD Module for Your Product?

Define the Product’s Display Requirements and User Environment

Choosing the right LCD module begins with the product’s real display requirements. Define what users must see, where they will stand, and how quickly information should appear. A warehouse scanner may need sharp text under bright ceiling lights. A medical monitor may require stable colors and wide viewing angles. These needs differ greatly.

Study the user environment before selecting specifications. Measure ambient light, operating temperature, humidity, vibration, and available installation space. Outdoor equipment may need high brightness, anti-glare treatment, and reliable readability in direct sunlight. Factory operators might wear gloves, so touch sensitivity needs practical testing. Moisture near the screen can cause false touches. A sealed structure may also increase heat inside the enclosure.

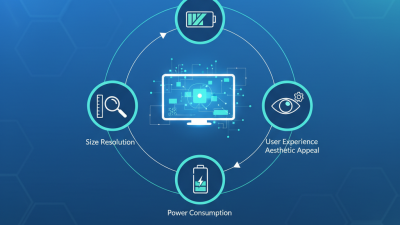
Power consumption matters in portable products. Check the module’s voltage, interface, backlight life, and startup behavior. Confirm that the controller matches the planned processor. Do not rely only on a datasheet. Build a working sample and test it with the actual enclosure, cable length, and protective cover. I have seen a display look excellent on a bench, then become unreadable behind tinted plastic. A first specification is rarely perfect. Recheck viewing angles, touch accuracy, and screen brightness after several hours of operation. Also ask whether replacement units will remain available throughout the product’s expected service life.

Compare LCD Module Types, Sizes, Resolutions, and Viewing Characteristics

How to Choose the Right LCD Module for Your Product?

Choosing an LCD module starts with the product’s working environment, not the screen size. A 2.4-inch TFT module may suit a handheld meter, while a 10.1-inch panel gives dashboards clearer spacing. TN modules cost less, but IPS panels usually provide wider viewing angles and more stable colors. According to Omdia’s 2024 Display long-term Demand Forecast, automotive display area demand continues to expand, increasing pressure for larger, brighter, and more reliable panels. That trend matters beyond vehicles. Outdoor equipment also needs strong contrast and controlled brightness.

Resolution should match viewing distance and software detail. A 320 × 240 display can remain practical for simple readings. A 1280 × 800 module looks sharper for maps, charts, and touch interfaces. Higher resolution also increases processing, memory, and power demands. Do not chase pixels blindly. Measure the smallest text at the user’s normal distance. I have seen prototypes with beautiful screens that became difficult to read under sunlight. Viewing angle, luminance, contrast, and surface treatment deserve equal attention. The SID Display Week market outlook also highlights continuing demand for high-performance display applications, but performance is never a substitute for fit.

Tips: Request samples from at least two viewing angles. Test the module at its lowest expected temperature. Compare glossy and anti-glare surfaces under real lighting. Check the datasheet’s typical values, not only maximum ratings. A small mistake here can become an expensive enclosure redesign.

How to Choose the Right LCD Module for Your Product?

Compare common LCD technologies by their representative horizontal viewing angle. A wider angle is generally preferable for products viewed from different positions.

TN LCD
Cost-effective and commonly selected when fast response and low power consumption are priorities.
IPS LCD
Suitable for interfaces requiring consistent colors and wide viewing angles.
VA LCD
A practical choice when higher native contrast and deeper blacks are important.
STN LCD
Often used for simpler, low-power displays where moderate viewing performance is acceptable.

Representative typical values based on common LCD module specifications. Actual performance varies with panel structure, polarizers, viewing direction, temperature, and operating conditions.

Evaluate Interface, Touch, Power, and Mechanical Compatibility

How to Choose the Right LCD Module for Your Product?

Interface selection should start with the host system, not the display size. Confirm whether the product needs RGB, LVDS, MIPI-DSI, or another interface. Check resolution, refresh rate, color depth, cable length, and controller support. A 2024 industry forecast estimates the global touchscreen display market will grow at roughly 5% annually through 2032. That growth reflects more interactive equipment, but it also increases interface complexity. In prototype reviews, an overlooked timing setting can produce flicker, blank screens, or unstable images. Small detail. Request a verified timing table before approval.

Touch performance depends on the cover lens, glove use, moisture, and electromagnetic noise. Projected capacitive touch may feel precise, yet thick glass can reduce sensitivity. Confirm the touch controller, gesture firmware, and communication bus separately. IEC 61000-4-2 testing is useful for evaluating electrostatic discharge resilience. However, passing a laboratory test does not guarantee comfortable field operation. Wet fingers remain a common blind spot.

Power and mechanical fit need equal attention. Compare typical, peak, and sleep current at the module level. A 2023 energy-use assessment found display power can form a significant share of portable electronics’ operating demand, especially at high brightness. Check backlight voltage, connector orientation, mounting holes, bezel clearance, and cable bending radius. I once treated a two-millimeter gap as harmless. It was not. Thermal expansion, screw pressure, and enclosure warpage can damage an otherwise compatible LCD. Build a physical sample early, then test touch, power, and image quality together.

Assess Brightness, Durability, Temperature Range, and Compliance Needs

How to Choose the Right LCD Module for Your Product?

Brightness should match the real viewing environment, not a showroom. A panel rated at 1,000 nits may remain readable outdoors, but it can increase power use and heat. Check luminance, contrast, viewing angle, and dimming performance together. Test dark screens under sunlight. Test white screens in low light. A first impression can mislead.

Durability depends on more than a strong cover lens. Review vibration, shock, humidity, surface hardness, and connector retention. For equipment used outdoors, confirm sealing and resistance to dust or water. Temperature testing also needs care. Check startup, operating, and storage limits separately. A module may operate at 70°C but fail to start at that temperature. Thermal cycling can expose weak bonds and uneven backlight behavior. It is tempting to trust the widest range.

Compliance needs should be defined before sampling. Identify destination markets and applicable requirements for electrical safety, electromagnetic compatibility, restricted substances, and recycling information. Ask for current test reports, material declarations, and change-control procedures. Verify whether the complete product, not only the LCD module, meets the required rules. Keep records of revision numbers. Datasheets can become outdated. A practical evaluation uses measured samples, environmental testing, and supplier documentation. Leave time for retesting when the enclosure, cable, or power supply changes. Trade-offs remain. Better brightness, ruggedness, and temperature performance may increase cost, thickness, or energy consumption.

Select Suppliers by Quality, Customization, Support, and Total Cost

How to Choose the Right LCD Module for Your Product?

Selecting an LCD module begins with supplier quality, not the lowest quotation. In product development, small defects can become expensive: uneven backlighting, dead pixels, loose connectors, or poor viewing angles. Ask for sample units and inspect them under your actual enclosure and lighting conditions. Request test records for brightness, contrast, temperature range, vibration, and connector durability. Reliable suppliers should explain their inspection process clearly.

Customization matters when standard dimensions do not fit your product. Discuss active area, glass thickness, touch functions, mounting holes, cable direction, and firmware needs early. A capable engineering team can review drawings and identify problems before tooling begins. Confirm whether the supplier controls key processes internally or depends on unknown subcontractors. That detail affects consistency. We once underestimated cable clearance by only two millimeters. It delayed assembly testing.

Support should continue after the sample stage. Check response times, engineering communication, replacement procedures, and documentation quality. Ask who handles urgent technical issues during pilot production. Total cost includes tooling, freight, inspection, minimum order quantities, rework, and future revisions. A cheaper module may require new fixtures or extra labor. That is not cheap. Compare suppliers using the same technical requirements and a written cost model. Then test production samples, because promised performance and factory performance can differ. Some decisions still require judgment, especially when schedules are tight.

How to Choose the Right LCD Module for Your Product? - Select Suppliers by Quality, Customization, Support, and Total Cost

Evaluation Category Key Data Dimension Practical Target or Benchmark Evidence to Request from the Supplier Weight Common Risk Signal
Quality Display performance Brightness of approximately 250–500 cd/m² for indoor use; 800 cd/m² or higher for strong ambient light. Confirm contrast, viewing angle, and color requirements. Datasheet, optical test report, sample measurement, and inspection standards. 10% Specifications are stated without test conditions or tolerance limits.
Reliability and service life LED backlight rated life commonly 30,000–50,000 hours, subject to temperature, brightness, and operating conditions. Reliability test plan, temperature-cycle results, burn-in procedure, and failure-rate data. 8% No defined test duration, operating conditions, or failure criteria.
Defect control Written limits for dead pixels, bright pixels, mura, scratches, dust, flicker, and cosmetic defects; acceptance levels should be agreed before mass production. Quality control plan, approved sample, AQL or zero-defect requirements for critical defects, and outgoing inspection records. 7% The supplier uses a general visual standard instead of a product-specific limit.
Process and compliance control Traceable production, controlled engineering changes, and applicable compliance documentation for materials and the target market. Quality certificate, material declarations, change-control procedure, lot traceability, and corrective-action records. 5% Certificates are expired, unverifiable, or unrelated to the actual production site.
Warranty and field quality A clearly defined warranty period, return procedure, failure analysis process, and replacement or repair commitment. Warranty terms, historical defect rate, 8D corrective-action example, and response-time commitment. 5% Warranty exclusions are broad or responsibility for field failures is unclear.
Customization Mechanical integration Ability to customize outline dimensions, thickness, mounting holes, bezel, connector position, and flex-cable length to match the enclosure. 2D/3D drawings, tolerance stack-up, tooling quotation, and engineering sample. 6% The supplier offers only standard sizes or cannot provide controlled drawings.
Electrical and interface compatibility Interface, voltage, pinout, timing, touch controller, backlight drive, and software requirements match the product architecture. Interface specification, pin definition, initialization code, validation report, and compatibility sample. 5% Interface documentation is incomplete or testing is performed only on the supplier's hardware.
Development speed and minimum order quantity Sample availability commonly within 2–8 weeks for modified modules; confirm minimum order quantity and pilot-lot flexibility. Development schedule, sample cost, tooling lead time, pilot quantity, and mass-production capacity plan. 5% The quoted schedule excludes tooling, firmware, validation, or approval time.
Product continuity A documented lifecycle plan, last-time-buy notice process, and replacement strategy for long-term products. Product lifecycle statement, change-notification policy, and second-source or redesign options. 4% The supplier cannot commit to change notification or component continuity.
Technical Support Engineering response Named technical contact, initial response within one business day for urgent issues, and defined escalation path. Support service levels, contact list, escalation flow, and example technical responses. 7% All communication is handled by sales personnel without engineering ownership.
Validation and debugging assistance Support for display tuning, EMI or signal issues, touch performance, thermal conditions, and system-level validation. Validation checklist, lab capability, troubleshooting records, and remote or on-site support plan. 7% The supplier provides samples but no system-integration support after delivery.
Documentation quality Complete and revision-controlled datasheets, drawings, test reports, programming information, and packing specifications. Document index, revision history, approved technical file, and change notification records. 6% Different documents contain conflicting dimensions, pinouts, or electrical limits.
Total Cost Unit price Compare quotations using the same size, resolution, interface, brightness, touch function, packaging, and delivery terms. Itemized quotation with volume tiers, included features, currency, validity period, and delivery terms. 8% A low price excludes tooling, cables, testing, packaging, or required accessories.
Non-recurring engineering cost Include tooling, custom masks, firmware work, fixtures, engineering samples, certification tests, and validation labor. One-time cost breakdown, ownership terms, amortization method, and refund or reuse conditions. 5% One-time engineering charges are disclosed only after purchase commitment.
Logistics and inventory cost Evaluate lead time, minimum order quantity, safety stock, packaging efficiency, freight, duties, and payment terms. Lead-time history, packaging dimensions, shipping terms, capacity plan, and supply continuity analysis. 6% Long lead times or large minimum orders create excess inventory and obsolescence exposure.
Failure and lifecycle cost Calculate inspection, rework, field replacement, warranty handling, downtime, redesign, and end-of-life costs in addition to unit price. Historical return rate, warranty cost policy, failure-analysis process, and lifecycle-risk assessment. 6% The supplier cannot provide quality-cost data or assigns all downstream costs to the buyer.
Total Evaluation Weight 100% Select the supplier with the strongest weighted result, not simply the lowest unit price.
Recommended scoring method: Rate each dimension from 1 to 5, multiply the rating by its weight, and compare the weighted total. A score of 5 indicates verified evidence and low implementation risk; 3 indicates acceptable but incomplete evidence; 1 indicates significant gaps or unverified claims.